Showing posts sorted by relevance for query elementary. Sort by date Show all posts

Wednesday, October 3, 2018

We are BACK!

So....it has been quite some time since I have posted.  Another baby has joined our family and we are still in a waiting game with our classroom.  It is under construction AGAIN!  This time, we are putting tile down to avoid any more delays in our schooling if our cool pipe wants to burst again.  I have to admit that it is quite frustrating and a huge disruption to our school year.  However, I am trying to stay patient and joyful in the meantime.  So, for awhile, the pictures that I post will be from my main living area, not the classroom.  Once we are back in business, I will post a new tour of the classroom. 

Just to keep you up to date, here is a run down of the ages of children we have:
Kui - Upper Elementary
Bubs - Lower Elementary
Nito - Primary/Transitioning into Lower Elementary
T-Man - Primary
Mumbs - Toddler
The baby - Infant

Let me first tell you that homeschooling Montessori is quite the challenge, but it absolutely can be done.  I have met my fair share of challenges, but the connection with the materials and the children always bring me back to why I do this in the first place.  For example, I was in sort of a slump with the classroom situation, but I was able to present T-Man the spindle rods, Nito the stamp game, Bubs the number base board, etc. and I instantly had my joy back!  My husband even commented on how joyful I was that day when he was working from home. 

I hope to break down some new presentations this year, especially for Elementary.  In the meantime, here are a few pictures from the week.

T-Man is working on the cards and counters.  

Mumbs is doing what every other toddler does.  Destroys the environment!  Who doesn't love a good game of matching up the color tablets after they have been dumped upside down?  Actually T-Man saw these later and sorted them all out.  So, maybe there is some good that comes out of the chaos?!?!

Kui is doing some good ole review on the decimal board.  

Bubs is working on an outline using our writing program, IEW.  See that post here.

T-Man's work with the number rods and cards.  I think he had some help from Bubs (who was trying to get out of his own schoolwork!).

Thursday, August 25, 2016

The Five Great Lessons of Montessori Elementary

The Five Great Lessons is a group of impressionistic stories that are meant to provide elementary students with a “big picture” of the world.  At this stage of development, most of the children are becoming aware of the world and how they fit into it.  These lessons can spark the imagination and help children to think not only of the past, but of the future as well.  Stories speak so well to children at this age and the re-telling of these important Cosmic lessons motivate children to research areas that are of interest to them.  

Each of the Great Lessons helps the child to dive deeper into different areas of the classroom.  They might be encouraged to explore topics such as history, geography, math, science and language. Perhaps the most important, children acquire gratitude for those who have come before them.  These lessons contain a great deal of information so it is important to give the children ample time to discover different areas in each lesson. 

I have listed out some possible topics that could be explored within each Great Lesson.  This list is not extensive.  I found it somewhere, but can't remember the website.

The First Great Lesson: The Beginning of the Universe and Earth

  • The Universe
  • The Solar System
  • Composition of the Earth
  • Volcanoes
  • Rocks
  • Chemistry: The Three States of Matter
  • Creation Stories
The Second Great Lesson: Life Comes to Earth
  • Bacteria
  • Plants (classification and parts of: ferns, conifers, and flowering plants)
  • Fossils
  • Trilobites
  • Dinosaurs
  • Living and Nonliving
  • Classification Work
  • Kingdom Animalia (Classification and parts of: insects, fish, amphibians, reptiles, birds, mammals)
  • Oceans and Ocean Life
  • Supercontinents (Pangaea, Laurasia, Gondwanaland)
  • Continents
  • Mountains
  • Oxygen & Carbon Dioxide

The Third Great Lesson: Humans Come to Earth
  • Ancient Civilizations
  • Fundamental Needs
  • The History of:
    • Tools
    • Food preparation and Storage
    • Clothing
    • Shelter
    • Transportation
    • Medicine
    • Defense
    • Art
    • Religion/Spirituality
 
The Fourth Great Lesson: How Writing Began

History of Writing
  • Hieroglyphic and Cuneiform Writing
  • Different Alphabets
  • Different Writing Systems (letters and characters)
  • Ancient Civilizations
  • The Printing Press

The Fifth Great Lesson: How Numbers Began
  • History of Numbers
  • History of Mathematics
  • Different Number Systems
  • How ‘zero’ came to be
  • The invention of the Calendar
  • Systems and Units of Measurement
  • Economic Geography

As you can see, there is plenty of material to cover in between the telling of the Lessons. While it is important to tell the First Great Lesson as early in the year as possible, time should be left between the Great Lessons to give your child the opportunity to explore.  Also to note, the Great Lessons are repeated every year throughout the elementary span of 6 years.  Each year, the child will learn something new or dig a little further into a topic that particularly interests them.  I have presented these to my daughter a few times now and she pulls out different information from them every year because she is a little older and in a different stage of development. 

Saturday, September 26, 2015

The 1,000 Chain

 
Well Bubs has made it to the 1,000 chain!  I really can't believe it.  He is really into counting and numbers these days.  When we are at Mass, he just opens the missal and starts counting the numbers in the Table of Contents!  He does seem to always point out to me the number 23.  He says, "Look Mommy that's how old you are!"  I have to remind my dear son that I am indeed not 23, but rather 32.  Clearly we have a little more work to do. 
 
Anyway, back to the 1,000 chain.  Bubs was sailing through the teen board and ten board so I moved along and presented the 100 chain to him to see how he would do.  Well.....he did it correctly the next time he took it off of the shelf on his own, so I watched him do it one other time by himself and then moved him on.  But here is where the challenge began.  Now I had to get creative with this gigantic chain.  Where shall we do it?  Do we have enough work rugs?  How can I time this presentation to fit nicely into T-Man's nap time?  (I wouldn't want 1,000 beads rolling all over the hardwood because T-Man thought the chain makes a better necklace or toy than a material!  It was sort of a spur of the moment presentation because he was asking for something else so I winged it (which is never a good idea to do in primary since the child really needs that sense of order and all of the materials ready for him as opposed to the elementary child).  Nonetheless, I persevered and improvised.  Only my daughter knew that I was using the Black Strip from elementary as a work rug (Shhh!).  But hey, it worked perfectly!  When you are homeschooling on a budget, you really have to work with what you have.  That thing was collecting dust anyway.  (Until now, because my daughter saw it again and of course wants another presentation on it like yesterday.)


Bubs was placing a hundred square at every hundred beads.

We managed to stretch the chain from the far end of the living room to halfway through the kitchen.  Thankfully T-Man slept the whole time.

Bubs really did the entire thing by himself.  I started him off and it is basically counting by 10s all the way to 1,000. It looks like this: 1, 2, 3, 4, 5, 6, 7, 8, 9, 10, 20....100, 110, 120,.....980, 990, 1000.
 
Then at the end, you can put the 10 hundred squares next to the 1,000 cube to show that there are 1,000 beads!  Voila!! 
 
He did get it out the next day, but T-Man was awake so it was quite interesting to see how he managed to lay it out in the classroom.  He made it all the way to 700 before Nito had his way with it and messed up the labels.  Boy oh boy you can imagine how that went down........

Monday, July 13, 2015

Multi-aged classroom


Well, it's about that time of year again.  We are working off of a year round calendar this year so we are getting started with school next week.  (Yikes!!!  I haven't made any of the materials that I dreamed of making yet.  Where did the summer go already??).

Before we start back this year, I did a little organization.  Of course..... I mean, what brings me more joy than reorganizing a room??  Oh wait.....tea and muffins. Ah.......  Ok back to the classroom.  I will attempt to describe a little about how our classroom is setup and how we will manage to "make it work" in one space.  Right now, I technically have four environments: Elementary, Primary, Toddler, and Nido (infants).  The Nido (not to be confused with my little guy Nito's nickname) is quite neglected along with the toddler (even though my training is in this area).  Nito is really working his way out of toddler and just dipping his toes into some sensorial and practical life material from primary.  This might make my environment a little more manageable with toddler materials put away.

We recently added a few more bookshelves to the environment and this has helped me to organize the materials more into categories than age levels.  It is not really ideal to have them intermixed, but it will have to work in our classroom for now.  Things might change as we add materials or as the children grow.  For instance, we now have a large bookshelf with all of the math materials.  I just put the primary materials on the lower shelves for Bubs to reach them and Kui can keep her racks and tubes and checkerboard beads higher away from Nito.  For someone who hasn't experienced it, there are ALOT of beads associated with racks and tubes and they roll very nicely on hardwood floor......right under all of the shelves.  Makes for cleaning up to be a challenge.  It's sort of like 52 card pickup with 4 times the beads!

Another nice element thrown into the mix is T-man.  He is now 11 months old and quite the destructive little fella.  He can make a room look like a tornado hit it in a matter of minutes!  It makes organizing the classroom quite interesting.  We may have to live with the bottom few shelves empty on each bookshelf until he moves away from being a shelf sweeper.  Not to mention that the smallest cube of the pink tower, the ones bead from the bead cabinet, and the small knobbed cylinders are all within his little grasp and make perfect choking hazards!  Good thing I have three little observant helpers to keep T-man alive during the school day.

I have added just a few pictures below of the classroom while I'm in the process of reorganizing.  The picture below is our bead cabinet and math shelf.  I still need to spiffy it up a bit, but it works for now.  My mom made Kui a quilted checkerboard and decimal checkerboard so they roll up nicely and are in the basket in the corner.  Helps save on space!


This next picture has a lot going on due to the size of the materials along with the shelving that I have and the best use of it.  The fractions are sitting on the top and are as close to the math section as I can manage for now.  Then below on that shelf is some practical life materials along with a dishwashing basin and table washing to the left.

 
I will post more pictures as I get things organized.  The other side of the classroom looks like T-man just passed through so I won't be posting any pics of that.  It is the elementary side and has some exciting materials for him to explore, including beer bottles used for making different tone sounds!  Gotta love it when you look over and see your baby blowing in a beer bottle.  Oh the joys of homeschooling.  Priceless......
 

Friday, August 26, 2016

Great Lesson #1 - God with No Hands

God with No Hands
 
I was very excited to present our first Great Lesson in our Montessori Elementary Curriculum for this year.  It was extra special because Bubs joined us this year.  (See my post here on an explanation of the Five Great Lessons used in the elementary classroom.)
 
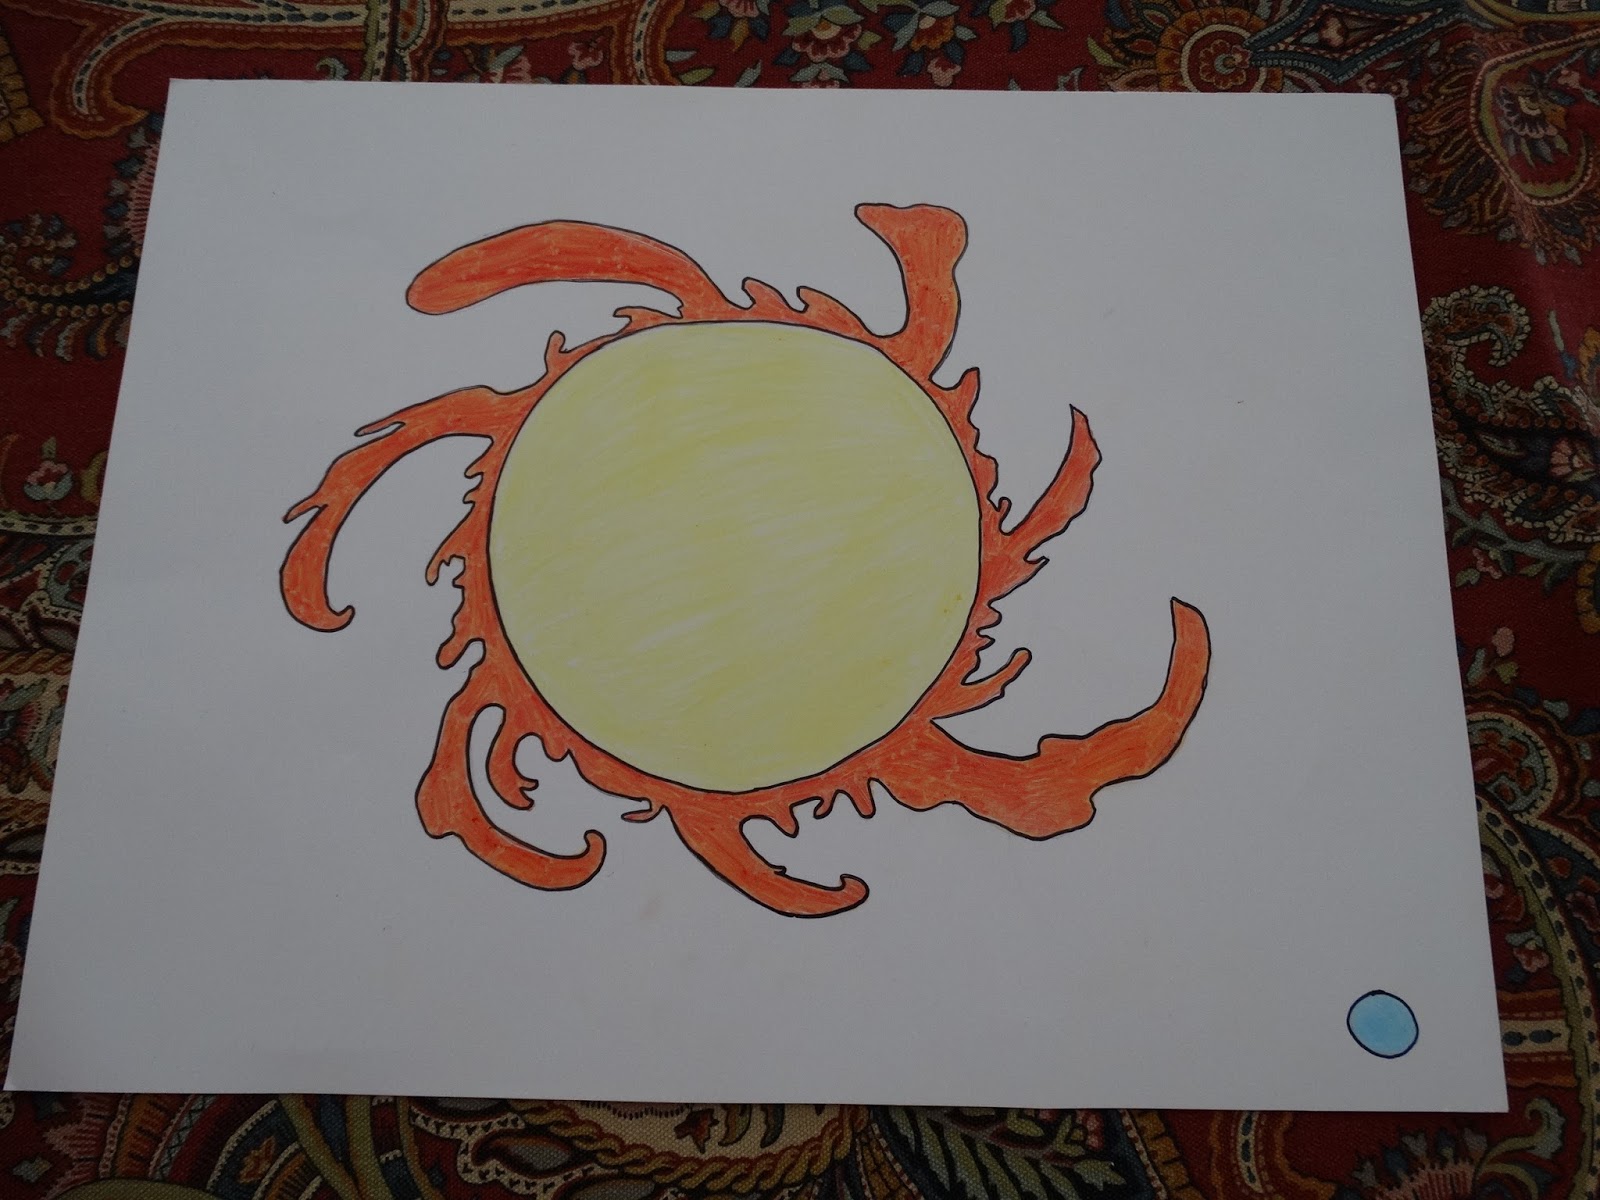
The first lesson begins by telling the story of how God created the Earth.  The kids are always fascinated by the name of the lesson: "God with No Hands".  The story goes on to explain how God with no hands or feet could have created the universe and all that is in it.  In the end, the children discover that everything obeys God and he has made a plan for each and every particle that he created.  There are 4 charts that go along with this lesson and 6 demonstrations.  (Please note that all of these charts were drawn by hand and I have absolutely no artistic skills whatsoever.  I apologize if they do not resemble the original AMI charts exactly!)
 
 
Chart 1: Earth Compared to the Sun 
 
 
Chart 2: The Dance of the Elements
 
 
 Chart 3: Volcanoes and Clouds
 
 
Chart 4: Volcanoes and Water


Demonstration 1: 3 States of Matter: solid, liquid, gas
 
Each glass is placed in front of the child, starting with the ice, and each state of matter is discussed.
 
 
Demonstration 2: Forces of Attraction
 
Hole punches are slowly dropped into the water, working first from the outside, then slowly toward the middle, ending when they start to come together.
 
Demonstration 3: Model of a Liquid
I did not have any bebes or iron shot for this so we skipped it.  Hopefully I will get these materials soon and add them to the shelf.  In this demonstration, I would tip the jar of bebes from side to side to show them rolling over one another.
 
Demonstration 4: State of Matter and Heat
I didn't want to burn the house down so I skipped this one as well!  I talked to the children when a candle is lit, the wax turns from a solid to a liquid.  It does this when the wax is heated.  They understood so we moved on.  I chose not to melt wax, iron, and bebes over the stovetop to test out the smoke detectors, fire extinguisher, and how fast the fire engine can make it to our new house!  Maybe when daddy is around, they can try this command card.  Heating the different elements is supposed to demonstrate changes to the solid or a lack thereof.


Demonstration 5:  Liquids Settle According to their Weight

 
I'm not sure if you can see in the picture, but the middle test tube has water, then we added honey, then oil.  The honey sank to the bottom, water in the middle, and oil at the top.  The kids really liked this one. 

 Demonstration 6: The Volcano
 
In this demonstration, you are supposed to light the candle and ignite the chemicals for the volcano to erupt.  Ok, I am 9 months pregnant and I am not trying to get any crazy chemical burn or yet again have to call for the fire department, so we opted for vinegar and baking soda for the eruption.  I do have the "scary" chemicals to make this happen with all of the bells and whistles, but I feel it will have to wait until later.  There are a few pictures to follow of the children adding the ingredients and the volcano erupting.

 Adding the baking soda.

 Adding the vinegar.  We added red dye.

 The anticipated ERUPTION!!
 
In the lesson, the children are told how a thin scum was formed and all of the elements underneath are still hot.  They felt trapped and wanted to get out.  (What else would they do?  They followed God's command of: "If you are hot, you expand."  There was no place to expand, so they burst out.  They broke the skin and there was a terrible fight.

We followed up this lesson with some really cool books on volcanoes, three-part cards for the parts of the volcano, and a worksheet to label the parts. 

Follow this link to see how we made our volcano.


Monday, July 18, 2016

Classroom Photos 2016-2017

As some of you know, we moved into a new house about 7 months ago and I am still trying to figure out how to make the space we have in the basement work for our classroom.  We had a pretty successful second part of the school year last year, but I made a few tweaks and hopefully they will work out for us.  I'm sure I will be making more in the months to come since we have a new baby arriving in September!  I have tried to relocate some of the larger book shelves to the more "dungeon" like area right when you walk in the classroom.  There just isn't much natural light there so I put some of elementary books and teachers materials there.  I also tried to open up the classroom a little more by moving our obnoxious tv and couches over.  I decided to utilize our love seat in the arrangement of the classroom to have a cozier feel to it. 
 
 
This is the dreary corner right when you come into the classroom and the dark spot on the right hand side is the bathroom.  I have some elementary language stuff here, random science stuff like the microscope, history charts up top (multi-colored), and the history curriculum (Story of Civilization along with Story of the Bible).  I really just don't have the space to separate all of these things into nice shelves so they kind of each get their own shelf on the same bookcase.
 
This photo shows some of the math shelves.  I decided to add a few more math shelves so that they could all be in the same location and we could have the different materials out for three different age groups.  Ideally, all of the materials are out at once, but with homeschooling Montessori, you really just need what the child is working on plus the material that he will be heading towards.  These materials are on constant rotation it seems like.

Another picture of some of the math shelves. 
 
This is when you are walking into the main part of the classroom. 

Here is where I have tried to open it up a bit and added the couch on the right hand side.  Some of the shelves are still bare because I am trying to finish up making materials.  (Man, that photo collage on the wall looks a lot better in person!  Looks a little crazy in the picture.  I am hoping to add more as the year goes on.  Perhaps it will look better then! Ha)

View of how I tried to incorporate the love seat.  There is a walkway behind those shelves to get to the bigger couch and it is still possible to watch education videos on the tv during the school day.  I forgot to take a pic of the poetry corner I set up on the other side of those shelves.  There is a cute little rocking chair with a basket of poems for all ages.

Another angle....

 This angle is if you were sitting on the love seat.  I have Kui's table in the corner and I moved Bub's table closer to me so I would have better access to him while I was working with her.  I also moved the tall bookshelf and replaced it with the smaller black ones on the left hand side which seems to have opened up the space a little more.

T-man's space keeps getting rearranged.  We moved the large wash basin upstairs to the main living area along with some of the practical life exercises like flower arranging, plant watering, and window washing.  This allows him and Nito to make better use of those materials more often in everyday life.  Plus it frees up space downstairs.  I am in the process of adding more language materials for T-man as well which will take up more space on the shelves. 

View from Kui's table in the corner.
 
Please let me know if you have any suggestions to our classroom or if you wanted a closer look at the different shelves.  I have added quite a bit of language materials to the primary section so I hope Bubs and Nito start thriving in that area!!


Tuesday, May 3, 2016

Adding Fractions - Different Denominators

Good ole fractions!  We finally dusted these bad boys off again.  Kui is pretty behind on fractions so I am making quite the effort to get her back into the swing of things.  I think I was initially scared off from these when I was looking in the album.  Not quite sure why.  Maybe it is the endless amount of charts that need to be made for the fraction work.  Who knows!  Regardless, I am back at it making more and more charts to be used for this work.  Kui was pretty excited to get a presentation today and worked very well.  We have been working upstairs this week because Bubs has been sick and quarantined upstairs.  I needed to stay close to hear him.  It worked out though.  We had plenty of space for all of the fraction pieces. 
 
Kui finished up the presentations for adding fractions with the same denominators awhile ago so we just took a minute to refresh the concept.  She picked up on the new concept pretty quick, however, we do need to dive back into the Least Common Multiple work so that she can be a little quicker in finding the common denominator.  We will do that tomorrow.
 
Here Kui is working with the first problem in the album.  I believe it was something simple like     1/2 + 1/4 =.  She needed to get the denominator in the same "family" like all halves or all fourths.  She looked at the fraction pieces and said, "How many fourths will fit in a half."  This should come very easy to the child at this point and she quickly found out that 2 fourths fits into a half.  So her equation changed to 2/4 + 1/4 = 3/4.  She could easily push all of the fourths together now since they were from the same family.  She worked on many simple examples like this today.
 
She also has this box of extra fraction pieces if she needs them.  Sometimes the fraction insets are not enough.  You can buy these plastic pieces here.  I believe I got mine from Montessori Outlet, but for some reason that link was not working.  They are a little pricey, but well worth it.  I never did end up finishing mine that I started cutting 3 years ago.  I just broke down and bought a set.  They are going to be more precise than my cutting skills anyway!

Once we went through a few examples and she got the hang of it, I introduced one of the charts to her.  This is a great visual to show how the fractions are changed to match the same family.  1/4 gets changed into 2/8.  It is very clear by the color coding on the chart.  Then you can add eighths with eighths.
 

She was very inspired by my beautiful drawing and coloring skills (NOT!!) and wanted to make her own chart.  Here it is below. 
 

It is actually a good review and practice for the child to do this.  It allows them to color which is Kui's all time favorite thing to do.

Here is another chart showing 3 addends and how we exchange along the way to see them all in the same family by the last row.  (Please remember that you can click on the picture to enlarge it.)  I realized half way through that all of my fraction pieces would not fit and I had to tape on a bottom piece.  Doesn't look the greatest, but gets the concept across.  I love this one because it also shows how the fraction can end up as 9/9 or 1.  This reminds the child to simplify the fraction when they are done. 
 

Here is Kui's attempt.  Can you tell her interest waned by the end?  It was approaching recess and her brothers were already heading out.  It is also a good reminder as to why making the charts is really the job of the teacher and not the child.  It is too labor intensive for the elementary child.  They have moved past this developmentally.  However, I did let her do it since I was trying to follow the child.
 
I also started making her some equations that she can do on her own for extra practice for each operation.  I still need to cut them out, but here is a picture for your reference.  Tomorrow we will probably touch on a refresher for Least Common Multiple before we move on to subtracting different denominators.  Plus, this teacher needs to get busy making the rest of the charts for this group!  It was a good reminder to check the state of the colored pencils every so often as well.  This child clearly needs a new set!  I was using a red pencil today that was the size of my pinkie.  Makes coloring nicely quite the challenge!

Sunday, January 10, 2016

Our New Classroom!

 
Finally, the move has happened and our classroom is setup.  We will start school tomorrow after having a much longer than anticipated hiatus.  I'm sure there will be tweaks and changes along the way, but for now I am just happy that it is functional for those kiddos to get back to work.  Did I mention that the lack of routine is making them bonkers?!  (Therefore me too!)  Bubs actually told my husband the other day that he hopes we never move because it would make him so sad.  My husband asked why and Bubs said that he just loved school so much and wouldn't want to have to move it again.  I'm pretty sure that motivated me last week to kick my booty into high gear and get that classroom up and running. 

This is part of the primary materials.
 
The original layout of the basement changed drastically when our huge tv and couches did not fit snugly in my ideal location.  Rather, they are taking up much of the open floor space I dreamed over while we were packing.  However, I think I managed to make it all work and I am pleasantly surprised with how much natural light comes in through the windows.  We have two large windows along with large windows on the two doors that lead outside.  There are a few areas that we need to have lights on to brighten it up a bit, but overall, we can use natural light and not feel like we are in a bunker. 

T-man's area

More T-man materials


This is the view when you come around the corner from the stairs and walk into the basement.
 

Primary and Elementary materials.  Kui will be using our old dining room table so that she has more space to spread out. 


This is the most awkward spot in the basement (my dream for the tv and couch).  I think it will work out ok and I think the bead cabinet will survive better far away from T-man. 


I managed to have T-man with an area all his own which is very exciting.  He got the short end of the stick in our old house and I'm sure he will thrive in his new space.  Plus this is where my official AMI training is.  The other environments are integrated a little, but I tried to keep Primary materials separate at least for Nito's sake since he is pretty new to the scene.  I had to get a little creative with space, but overall I feel like it will be functional.  The couch area will turn into a good little corner to read or just snuggle with the kiddos during school. 

Please feel free to leave me comments or feedback on how I could improve certain areas.  It is still all a work in progress.  This is only the 2nd year of trying this Montessori thing at home!  Enjoy the pictures.