Monday, October 28, 2019

School Days

School Days

Mumbs starting sandpaper letters and she is doing so well!  I don't think I have ever managed to start a child at 3 yr. old when you are supposed to!  I can see a huge difference with her interest and attention to detail when she traces each letter.  She started with 3 vowels and after a week, she knows all three short sounds that the vowel makes.  

She has also been dabbling with the red rods.  As you can see in the background, the toddler is very excited to help her.

Progress has been made now that the toddler has left the room!

Yay for Mumbs!  After some diligence, she got the red rods in order.

Brotherly love.  Nito reinforces his knowledge of the bow frame while he shows his brother T-Man.  

Nito also spent some time working on his multiplication with the multiplication board.  He's definitely ready to move on to the next presentation.

After the bow frame was brought out by her brother, Mumbs felt compelled to do the zipper frame.  Although she mastered that awhile ago!  

T-Man did some work with the cards and counters.  He's got this down and will be ready to move to the next presentation.  

Hmm.....some may ask where Bubs and Kui are.  Where was Bubs today????  That is a great question.  I believe he was working diligently on his spelling and vocabulary along with writing a story about construction workers.  Kui has officially moved on to a different homeschooling curriculum now that she is in 7th grade.  Unfortunately, we do not have a farm school close enough for her to attend.  


Thursday, October 24, 2019

Making a Globe

Making a Globe

The three boys have been working on their papier mache globe for over a week now.  I got the idea from the book, A Child's Geography: Explore His Earth by Ann Voskamp.  We started this endeavor after T-Man had such interest in the world map.  Of course, the older boys had to join in because it was too messy and fun to not be involved.  And don't forget that it wouldn't "be fair"!.  

The setup was pretty straightforward.  It consisted of 3 tasks.

1. Rip strips of newspaper.  How many you ask?  A TON.  Every free moment they had, they were ripping newspapers into strips.  Just a tip, have them do this outside!  You wouldn't believe the mess that newspaper makes from black hands to random pieces of newspaper strewn from one side of the room to the other.  The strips should be about an inch wide and about 6-8 inches long.  Although the length doesn't really matter.  

2.  Make the paper mache dough.  Mix one cup flour with one cup water.  Then add 4 cups of boiling water and voila!  A super duper sticky mess.  I propose that you make this in advance because it will need to cool for some time.  The kids can't dip their strips into a boiling hot dough.  Now, I have to admit that this was the first time I have ever made paper mache dough.  It sounded straightforward.  I mean how hard could it really be?  Well.......apparently for me it can be tricky.  My first batch ended up being a clumpy mess once it cooled.  We were still able to maneuver around with it, but I'm pretty sure it is supposed to be clump free.  If anyone has had good luck with it, please leave me a comment below.  I know this won't be our last effort with paper mache.  

3.  Blow up your balloons.    The boys did this themselves thankfully.  We did have to end up doing a few extra for the young girls who now wanted them to play with and of course, inevitably, one of the boys popped before we even got started!


Alright.  Everything is a go.  The boys are putting their first strips on.  We found it very tricky to hold the balloon and do the strips at the same time.  It was helpful for one person to hold the balloon while the other person placed the strips.

Bubs dominated and found a way to do it one handed.

Almost done......

The first layer is complete.  Now it needs to be completely dry before a new coat is added.  The balloons need three coats before they can be painted.

This is what the second coat looks like.

The third coat is finally finished!

Ok, so by the end of the week (which is how long it took for all of the layers to go on and dry), the balloons had seen better treatment.  Some of the boys decided to use their balloons as soccer balls, weapons, etc. and now they look a bit like a tattered pinata.  This was Nito's balloon.  They painted the entire balloon blue for the oceans.  Then they started drawing the continents.  This was to be Australia.

After the outlines were made, they began to paint the globes.  They followed the colors from the original world map puzzle.  (See that presentation here.)

T-Man's is coming along. 

Once the paint dried, they labeled each continent.


Nito was very proud of his.  I refrained from telling him it looked quite interesting with a big hole in his Earth.  T-Man used his as a soccer ball.

Bubs displayed his on the hutch for all to see! Ha.

Good luck to anyone who tries to make a globe.  I hope you have success!

World Map


The World Map is always exciting to do with young children.  They see the globe in our classroom everyday, but can not quite fully grasp how large our Earth really is.  T-Man has been working with this for awhile now, but Mumbs happened to join in today and it was very cute.

The presentation consists of the child learning the names of the continents and then being able to label them.  However, T-Man can't read yet, so it requires an older child or myself working with him to accurately name the continents.


After he labels the continents, he places them back in the puzzle.  Then we do another 2nd period lesson with the names.  He is not quite at the 3rd period lesson.  We will hopefully move to that soon.  It's quite funny though.  He calls Africa, "Kenya".  Hey, at least he knows that Kenya is on that continent!  So, there is clearly some work to be done.  Mumbs is nearby during the presentation so she is absorbing all of it.  

Here is our Geography shelf.  It is a bit sad looking these days.  The colored boxes are the continent boxes (which I will post on another day).  However, some of the labels are ripped off from past crawling babies and it has clearly not been on the priority list to fix them.  The maps are disheveled and prop

Once the presentation was done, I took T-Man back to the globe to emphasize that the two "hemispheres" or circles that he was seeing on the flat map, were actually round.  Then we read a book with some interesting facts about each continent.  


Another material he used was some information on each continent.  It has a few cards for each one with famous landmarks.  I have continent boxes as well, but I usually present those as an extension after the child has done the individual continent map.  It contains food, clothing, musical instruments, animals, etc. from that particular continent.  See that post here.

As an extension and also a fun messy craft, see the link to the post on Making a Globe


.


Thursday, October 18, 2018

Stamp Game - Static and Dynamic Addition

Today, Nito worked more with the stamp game.  He learned the concept of dynamic addition.  For those of you who are new to the stamp game, it is simply an extension or moving more from the concrete to the abstract.  This material allows for the introduction of how to write the problem on paper along with using symbols.  Like other addition and subtraction work, we will have static and dynamic equations for the child to practice.  Static equations do not involve carrying or borrowing.  Therefore, dynamic equations will involve the child carrying into the tens, hundreds, or possibly thousands column for addition.  Regarding subtraction, this might entail the child having to "Borrow" from his neighbor "Mr. Ten", or "Mrs. Hundred" to find the answer.  Below is an example of each:

STATIC ADDITION:

Here is a picture of the set of equations that we use for the stamp game.  It breaks the equations up for the child depending on what they are working on.  The answers are on the back which help create independence for the child.
 
The stamp game can be used for all four operations (addition, subtraction, multiplication, and division).  This is the material, which again is color coded for the child. Hence, green is for units, blue for tens, red for hundreds, etc.

The stamp game also has specific paper to make it easier for the child, but you could easily make this yourself or use graph paper.

Here is what the equation card looks like.  Again, these equations are fantastic because they are color coded for the child.

I have Nito write out his problem on the paper before he begins to set up his material on his felt mat. 

Here is the problem laid out in the beginning.  He first sets out the top number. 

Then he lays out the second addend underneath.  (If you click on the picture, the card with the number will be easier to see.  I'm sorry if there is a glare.) 

This picture shows that he starts with the units.  So he pushed his 1 unit up with his 8 units since he is adding.  Then he counted all of his units again to find that he had 9 units altogether.  

Then he recorded his answer for the units.

Then he continued with the tens, and so on.

Recording his answer as he goes.
 
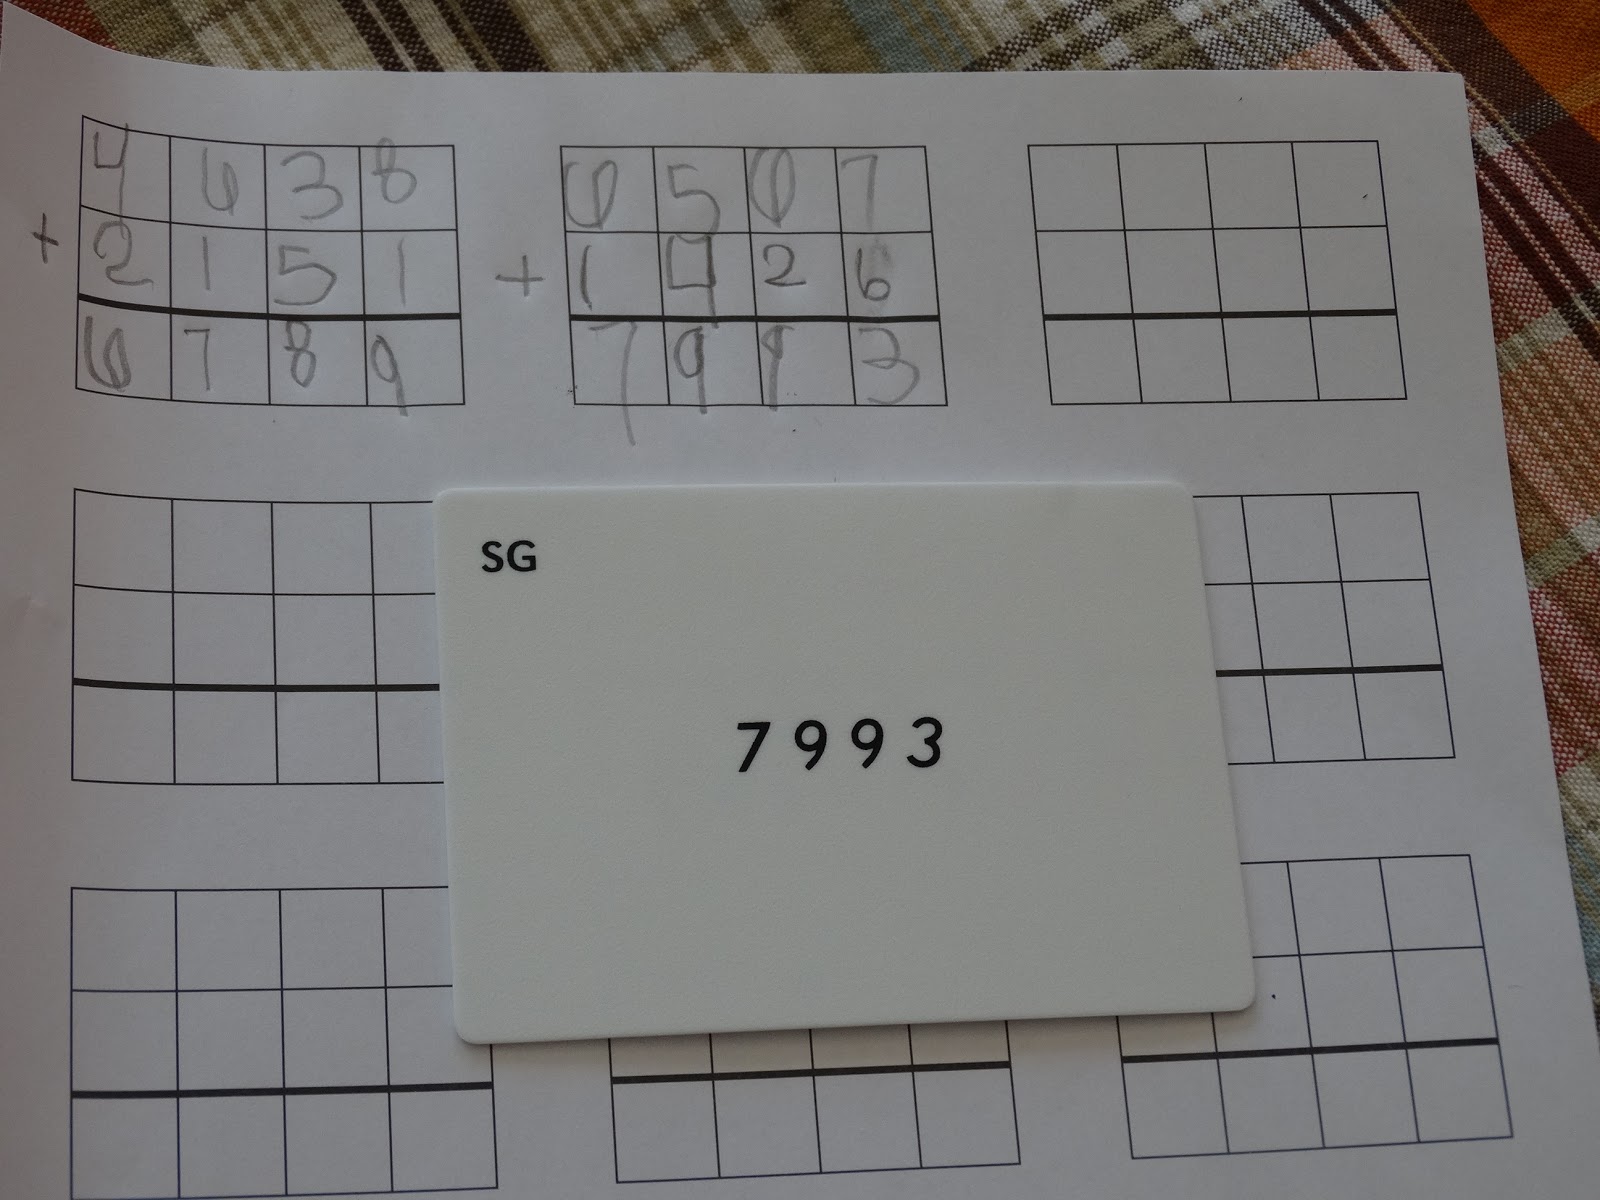
When he is done with the problem, he turns the equation card over to check his answer.  Yay!  He got it right.  (The SG in the left hand corner indicates Stamp Game.  We have additional equations for the Golden Bead Material (GBM) in the same box so it is helpful to have them labeled.)

DYNAMIC ADDITION:


Nito set up his problem in the same manner as if doing static addition.  He laid out his first addend.

Then he laid out the second addend below.

He pushed his 6 units up with the 7 units.  Then he starts to count them.

He stopped when he got to 10 and then replaced the 10 green unit squares with a blue 10 square shown above.

Now the blue 10 unit was put at the bottom of the tens column and the units column now has the remaining units, which is 3.  He then recorded the 3 units on his paper.

He continued with pushing the tens together, counting, and recording his answer.
 
When finished, he checked his answer.


Thursday, October 11, 2018

Fall art project


Well, I finally made some time to do art with the children.  Woo hoo!!  It seems as if art and music are always being pushed to the side.  However, the joy on the kids face along with Nito's comment has really encouraged me to make more time for this creative outlet.  He whispered to T-Man, "This is going to be so cool!". Kui also leans toward the creative side and I was happy to allow her to take some of her school time to make her artwork.  In the past, I felt like it was a "waste of time" because it was just messy and they never learned anything.  But to the contrary, they learned quite a bit in the process. 

First off, they had to learn patience!  I am only one person and there were 5 children wanting to paint at the same time.  Secondly, they were able to learn the names of the colors (young ones) and how to mix them to create secondary colors.  The younger ones were also able to work on their pincer grip. Not to mention that the older ones needed to know how to draw a tree.  After we cleaned up, it was a great segway into the seasons of the year and why the leaves fall off of the tree in the first place.


The project was quite simple.  We were making a fall tree with different colored leaves.  I picked up a few canvas' at Michaels, bu otherwise I had all of the supplies.  The "paintbrush" was simply 8-10 q-tips secured with a rubber band.  The kids thought this was pretty cool and it was chunky enough for the younger kids to hold.  I chose a few colors of paint that would represent the colors of the leaves as they change.  I splurged and went ahead and bought gold paint while I was at Michael's!  

Here is Mumbs making her leaves for her tree.  I turned the canvas upside down in the hopes of her actually getting the leaves on the limbs, but as you scroll down to the bottom, you will see that she was quite successful with her "leaves".

Bubs painting the base of his tree.

Nito decided to mix several colors together and create grass for the tree.  I tried to stop him before the entire canvas was painted green so that is why only half is painted.  He played it off like he wanted it that way and is very happy with the finished product.

Kui was having too much fun and went a little wild with her leaves.  Her explanation is that it is the beginning of Fall and most of the leaves are still on the tree.  I actually like hers better than mine (of course the teacher had to do one as the model right?!)  However, mine will not be showing up here on the blog.

Below are the finished products.   Kui's is the one at the top of the post.
Nito

Mumbs

T-Man

Bubs